Are you ready to explore the beauty of the night sky through the lens of your camera? If you are passionate about capturing the stars, planets, and galaxies above, then DSLR astrophotography is the perfect hobby for you. In this comprehensive guide, we will delve into the world of DSLR astrophotography and equip you with the knowledge and skills needed to conquer the night.
Understanding the Essentials of DSLR Astrophotography
Embarking on the journey of DSLR astrophotography demands a foundational grasp of its core principles. This fascinating branch of photography, focused on capturing celestial bodies and phenomena, brings the capacities of a simple DSLR into full use. The essence of this discipline lies in the technique of long-exposure photography. It allows light from distant stars and galaxies to imprint on the camera’s sensor over an extended period, revealing details invisible to the naked eye. It’s this balance between the amount of light and the time during which the sensor keeps open that unveils the universe’s splendour in photographic form.
Manual mode
To begin, one must familiarise oneself with the camera’s manual mode. This is because automatic settings rarely suffice under the night sky’s unique lighting conditions. Understanding how to manually adjust ISO, aperture, and shutter speed is paramount. The ISO setting controls the camera sensor’s sensitivity to light. A higher ISO increases sensitivity, essential in low light but potentially introduces noise. The aperture, denoted by f-numbers, affects how much light enters the lens. A lower number means a wider aperture, crucial for gathering as much light as possible. Lastly, shutter speed determines the duration the camera’s shutter remains open to capture light; longer exposures are necessary to capture faint celestial objects.
Grasping these essentials forms the bedrock upon which the art of DSLR astrophotography is built. As you progress, each photograph becomes a testament to not only the marvels of the cosmos but also the photographer’s mastery over light, time, and technology.
Choosing the Right Gear for Night Sky Photography
The Proper Lens
A wide-angle lens is particularly advantageous, allowing for expansive views of the night sky, whilst a lens with a fast aperture (f/2.8 or lower) is indispensable for capturing as much light as possible in dim conditions. A lens with a large focal length would be ideal for zooming in on planets and smaller deep-sky objects, serving as a mini refractor telescope.
A Tripod
A sturdy tripod stands as an essential accessory, ensuring stability during long exposure times that are characteristic of night sky photography. This mitigates the risk of camera shake, guaranteeing sharper images. Factor in the utility of a remote shutter release or a camera’s built-in timer to further reduce vibration when initiating an exposure.
Star Tracker
Consideration should also be given to the acquisition of a star tracker or a motorized equatorial mount, especially for those delving into deep-sky astrophotography. These devices align with the Earth’s rotation, allowing for longer exposures without the stars appearing as streaks due to the planet’s movement.
Backup
Lastly, don’t overlook the significance of extra batteries and memory cards. Long-exposure photography, particularly in colder environments, can deplete battery life rapidly. Having backups ensures that you’re prepared for extended shooting sessions, capturing the night’s majesty without interruption.
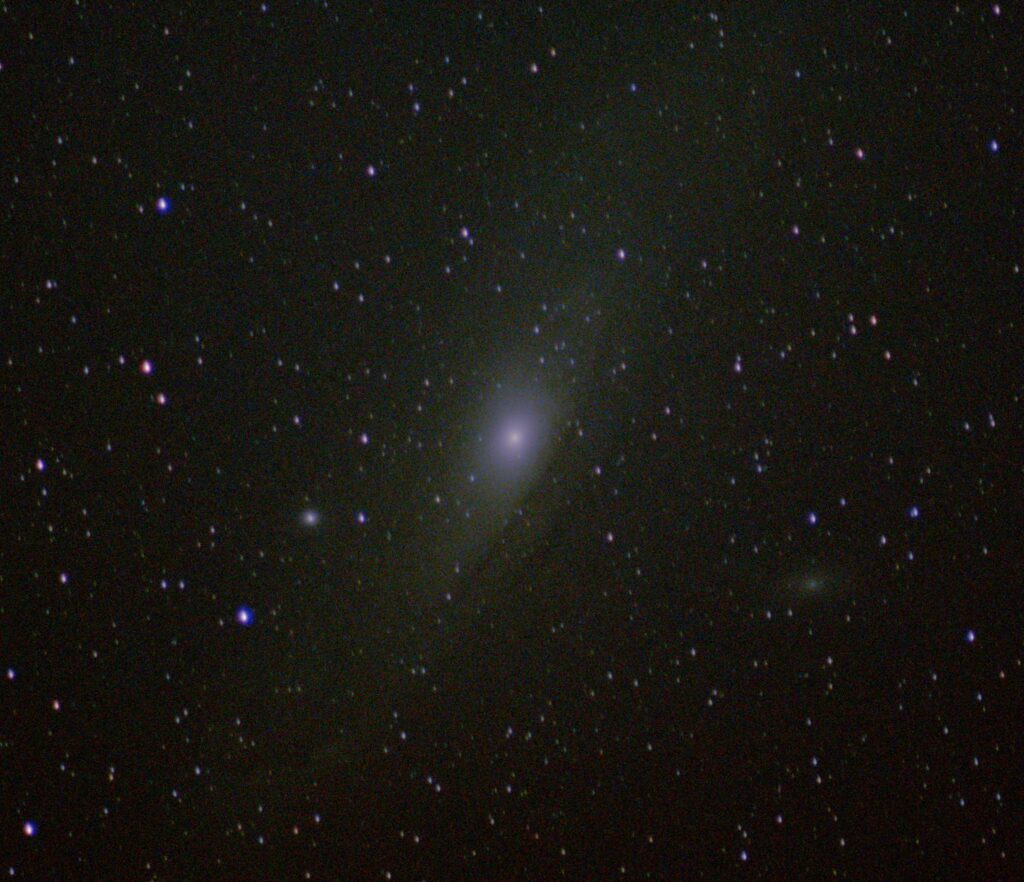
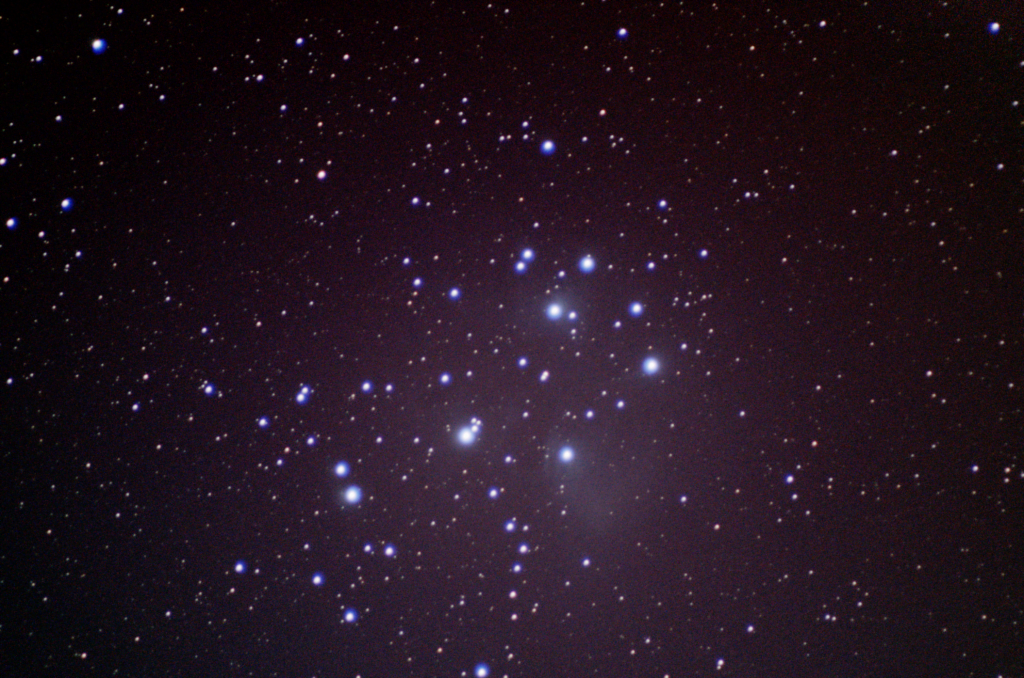
Each piece of equipment plays a critical role in the astrophotography puzzle. By judiciously selecting your gear, you set the stage for capturing the ethereal beauty of the cosmos with clarity and detail. The posts on the Orion Nebula, and the Andromeda galaxy describe how to take such photos.
The Importance of Location and Timing
Light Pollution
Securing an ideal setting is pivotal in the realm of DSLR astrophotography. The presence of light pollution serves as a significant impediment, obscuring the delicate intricacies of the night sky. Thus, embarking on a quest to find a dark sky haven, far removed from the pervasive glow of urban settings, is essential for photographers eager to capture the cosmos in its true splendour. Rural locations, national parks, or designated dark sky reserves offer sanctuaries where the Milky Way can reveal itself in full glory, free from the veil of artificial light.
Remembering Celestial Events
Equally critical to the success of astrophotography endeavours is the element of timing. Celestial events do not adhere to our schedules; thus, an astrophotographer must align their ventures with the rhythm of the cosmos. This involves meticulous planning around phases of the moon, with new moon periods providing the darkest skies conducive to deep sky imaging. Meteor showers, planetary alignments, and galactic core visibility are time-sensitive events, each offering a unique canvas for the photographer’s lens. Additionally, understanding the best seasons for observing specific celestial phenomena can greatly enhance the quality of the photographic pursuit.
Armed with patience and perseverance, the astrophotographer must also be prepared to adapt to the unpredictable nature of weather and atmospheric conditions. Clear skies are a prerequisite for astrophotography, yet they are often at the mercy of sudden climatic shifts. Thus, flexibility in planning, coupled with a keen eye on weather forecasts, becomes indispensable for seizing those fleeting moments when the universe unveils its wonders.
Mastering Camera Settings for Optimal Results
Achieving breathtaking astrophotography with your DSLR hinges on fine-tuning several crucial settings to adapt to the challenges posed by low-light environments. The interplay between ISO, aperture, and shutter speed is vital for optimal night sky captures.
ISO
Begin by adjusting the ISO; a higher ISO is beneficial for increasing the camera sensor’s sensitivity to light, thereby capturing more details of faint celestial bodies. However, it’s important to strike a balance as excessively high ISO values can introduce unwanted noise, detracting from the image quality. An ISO range of 1600 to 3200 often provides a good starting point, depending on the camera’s performance and the level of ambient light pollution.
Aperture
Next, setting the aperture to its widest possible value (the lowest f-number) allows the maximum amount of light to reach the sensor. Lenses with an aperture of f/2.8 or wider are preferable, as they can gather more light, essential for illuminating the dark nuances of the night sky.
Shutter Speed
Shutter speed plays a pivotal role in capturing the dynamic night sky. Longer exposures allow for more light to be collected, revealing the delicate structures of celestial objects. However, keep in mind that the sky is moving with respect to Earth, so the stars wouldn’t stay fixed in the middle of the screen. Thus, to avoid star trails caused by the Earth’s rotation, adhere to the ‘500 rule’, which suggests dividing 500 by the focal length of your lens to determine the maximum shutter speed in seconds. For example, with a 20mm lens, you should not exceed a 25-second exposure.
Experimentation with these settings is key, as varying conditions may necessitate adjustments. Incremental changes and reviewing results can guide you towards the settings that best suit the specific characteristics of the celestial scene you’re aiming to capture.
Crucial Techniques in DSLR Astrophotography
Diving deeper into the realm of DSLR astrophotography, enthusiasts can employ a variety of important techniques to elevate their night sky imagery.
Stacking
Stacking stands out as a powerful method to enhance image quality. By combining multiple exposures of the same scene, photographers can significantly reduce noise and bring forth finer details of celestial objects that single shots might miss. This process requires precise alignment of images, a task for which dedicated software is available.


Tracking Mount
Another advanced tactic involves the use of tracking mounts, also known as equatorial mounts. These sophisticated devices compensate for the Earth’s rotation, allowing for longer exposure times without the appearance of star trails. This is particularly beneficial for deep-sky photography, where capturing faint nebulae and galaxies is the goal. A well-calibrated tracker can dramatically improve the sharpness and detail of astronomical subjects.
Employing these advanced techniques demands patience and practice but rewards photographers with stunning, detail-rich images that truly capture the awe-inspiring beauty of the night sky.
Post-Processing Your Astrophotography Images
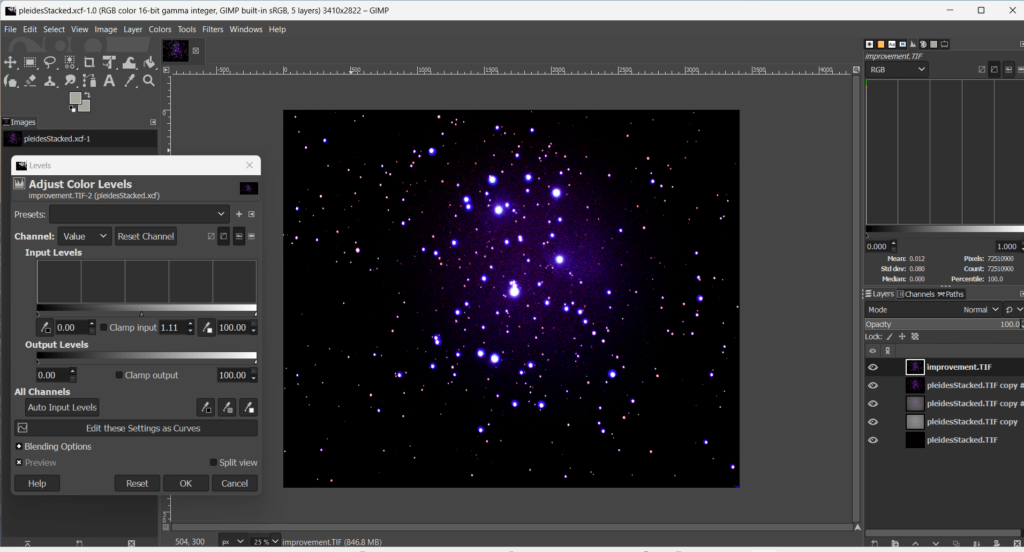
The final touch to astrophotography is often applied away from the field, within the realm of post-processing. This stage is where the raw captures of the night sky are transformed into vivid depictions of cosmic beauty. Utilising software like Adobe Photoshop or Lightroom, or free versions such as GIMP, photographers have the ability to adjust exposure, fine-tune contrast, and enhance the vibrancy of celestial colours that the camera’s sensor may have recorded in a subdued manner. This is the final stage where the picture is brought to reveal all the light the camera detected.

Noise Reduction and Masking
Attention to detail such as the reduction of noise, which can be particularly prevalent in night photography, is crucial. Techniques like noise reduction algorithms can help in minimising grain without sacrificing the finer details of the stars or galaxies. Layer masking offers another powerful tool, enabling the selective enhancement of certain areas of the image, such as bringing out the luminosity of the Milky Way, without overexposing other elements.
Contrast
Equally important is the art of balancing colours to accurately reflect the night sky. Adjusting white balance and colour temperature can correct any biases introduced by the camera settings, ensuring that the final image mirrors the natural hues of celestial bodies as closely as possible.
Sharpening is the last step in this meticulous process. A gentle application can make stars and nebulae more pronounced, but overdoing it might introduce artefacts. Thus, a moderated approach is advised.
In essence, post-processing in astrophotography is not merely about correction. It is an extension of the creative process, enabling photographers to convey the full splendour of the shot taken.
Common Challenges and How to Overcome Them
Navigating the world of DSLR astrophotography presents a constellation of hurdles, from the technical to the environmental.
- Noise is one pervasive issue, particularly at high ISO settings essential for night photography. Combat this by leveraging the power of image stacking, where multiple shots are merged to enhance signal and reduce noise. Stacking maintaings the integrity of the celestial subjects captured.
- Focusing is another significant challenge. Autofocus systems falter in low light, making manual focusing on a bright star or distant light source essential. Live view can aid in focusing a star, a critical step for crystal-clear astrophotography.
- Light pollution, the bane of night sky photographers, can wash out faint stars and smudge the Milky Way’s delicate structures. Targeting remote locations away from urban glow is ideal, but not always feasible. Thus, investing in a light pollution filter can be a game-changer. It helps to cut through the haze and restore contrast to the night sky.
- Battling the cold, which can sap battery life and numb fingers, requires preparation. Keeping spare batteries warm and close to your body until needed can extend shooting time. Gloves designed for photographers allow for dexterous handling of camera controls.
Each challenge in DSLR astrophotography, while daunting, can be mitigated with the right knowledge and tools, turning obstacles into stepping stones towards mastering the art of capturing the cosmos.


Pingback: DSLR Astrophotography: The Top 5 Budget Cameras - Sky Reviews
Pingback: Best Budget Telescopes: The Top 5 - Sky Reviews
Pingback: Astrophysics for People in a Hurry- A Book Review - Sky Reviews
Pingback: Best Tripods for DSLR Astrophotography: A Comprehensive Guide
I’m not that much of a online reader to be honest but your blogs really nice, keep it up! I’ll go ahead and bookmark your website to come back down the road. All the best
Nice post. I learn something more challenging on different blogs everyday. It will always be stimulating to read content from other writers and practice a little something from their store. I’d prefer to use some with the content on my blog whether you don’t mind. Natually I’ll give you a link on your web blog. Thanks for sharing.
We’re a group of volunteers and starting a new scheme in our community. Your web site provided us with useful information to paintings on. You have done a formidable job and our entire neighborhood will be grateful to you.
Please let me know if you’re looking for a article author for your weblog. You have some really good posts and I think I would be a good asset. If you ever want to take some of the load off, I’d love to write some content for your blog in exchange for a link back to mine. Please shoot me an email if interested. Thanks!
Very interesting information!Perfect just what I was looking for! “One man’s folly is another man’s wife.” by Helen Rowland.
Very interesting information!Perfect just what I was searching for! “All the really good ideas I ever had came to me while I was milking a cow.” by Grant Wood.
But wanna input on few general things, The website design and style is perfect, the subject material is rattling fantastic. “In business school classrooms they construct wonderful models of a nonworld.” by Peter Drucker.
Hello. impressive job. I did not imagine this. This is a excellent story. Thanks!
I’ve been browsing on-line greater than 3 hours nowadays, but I never found any interesting article like yours. It’s lovely price sufficient for me. In my view, if all site owners and bloggers made just right content material as you probably did, the internet can be a lot more helpful than ever before. “When you are content to be simply yourself and don’t compare or compete, everybody will respect you.” by Lao Tzu.
Artistic triumph! AI KungFu proves that AI can create unforgettable creative moments.
Awesome blog! Do you have any hints for aspiring writers? I’m hoping to start my own blog soon but I’m a little lost on everything. Would you suggest starting with a free platform like WordPress or go for a paid option? There are so many options out there that I’m completely confused .. Any ideas? Thanks!
I like what you guys are up also. Such intelligent work and reporting! Keep up the excellent works guys I’ve incorporated you guys to my blogroll. I think it’ll improve the value of my web site 🙂
I’ve been absent for a while, but now I remember why I used to love this website. Thanks , I will try and check back more frequently. How frequently you update your website?
he blog was how do i say it… relevant, finally something that helped me. Thanks
Tourism innovation! Best AI Tool guides travelers. This Best AI Tool suggests attractions based on real-time crowds!
It’s truly a nice and helpful piece of info. I’m glad that you just shared this useful info with us. Please keep us informed like this. Thanks for sharing.
I don’t even know how I ended up here, but I thought this post was great. I do not know who you are but certainly you are going to a famous blogger if you are not already 😉 Cheers!
Gambling can be thrilling, but it’s wise to bet with a strategy. Platforms like Jilislot offer great games, but always play responsibly and keep the odds in mind.
Very good written article. It will be helpful to anybody who usess it, as well as me. Keep up the good work – i will definitely read more posts.
Sprunki Incredibox brings fresh beats and visuals to the beloved music-mixing formula. It’s a fun twist that keeps the creative spirit alive. Check it out at Sprunki Incredibox!
Love how card-themed slots like Super Ace blend strategy with luck—it’s like blackjack meets spinning reels. The free spins feature really keeps the excitement going!
SuperPH22 offers thrilling gameplay and great visuals, but always stay cautious with high-reward slots. Check out SuperPH for a balanced approach to fun and security.
Very interesting subject , regards for putting up.
Really informative and fantastic bodily structure of written content, now that’s user genial (:.
An incredibly well-written article.